Message Tree Baby Quilt

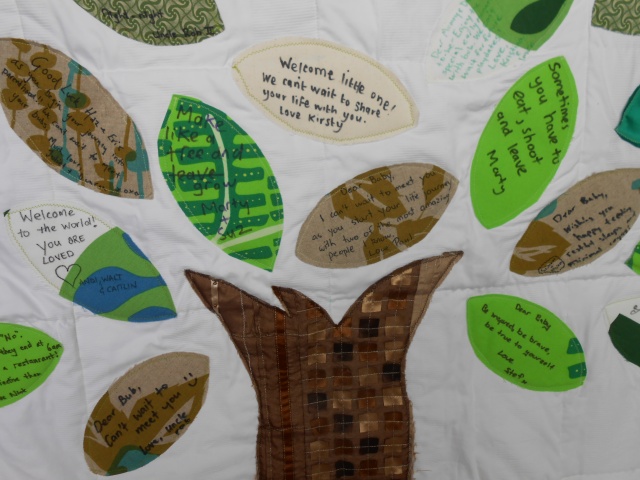
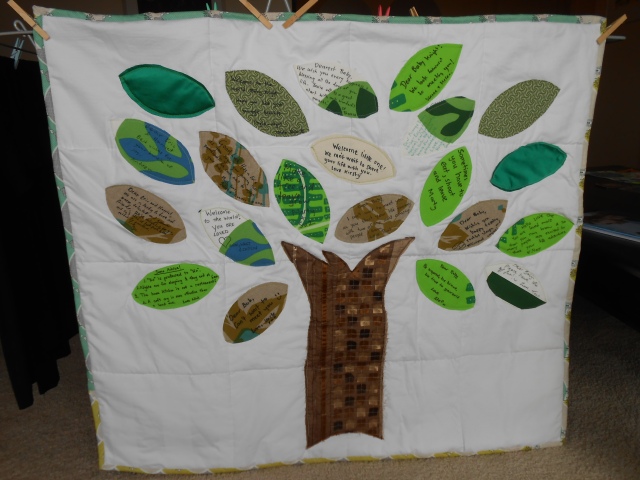
DSCN2747For friends of ours’ new baby I attempted my first quilt.  I definitely don’t claim to be a quilter so this was quite an interesting undertaking.  But I kept it simple and quite enjoyed the journey.  I’m pretty happy with the outcome.

At the baby shower BBQ, I got their friends to write notes to the yet-to-arrive-baby or soon-to-be-parents on fabric leaves that I had pre-cut out.  I then assembled it at home.  The leaves and tree trunk fabric were bits from my scrap stash, the front is an old duvet cover and the backing, edge fabric and batting are from Remnant Warehouse.  I must say a huge thank you to the very helpful ladies at Remnant Warehouse who gave me a crash course in quilting while I was buying the fabric.

I first eassembled the layers (back fabric, batting and front fabric) careful to leave enough of an edge that I could cut off to straighten once it was all put together.  I stitched straight across in a hash pattern.  I first tried this with my machine but it started getting bunched up in places so I did quite a few of the stitch lines by hand.

Next I ironed applique interfacing (double sided) to the leaves and trunk and trimmed the edges. Then the big assembly came with putting the trunk and leaves onto the quilt and making sure I ironed them all securely in place. I kept the edges of the pieces raw and then straight stitched or zigzagged around each leaf and the tree trunk. The final step was putting the binding on.  I made 2.5 inch straight binding (doesn’t need to be on the bais because it’s going around a square!) and used a nifty technique to sew it on: fold the binding in half and sew the raw edge aligned with the raw edge of the quilt. Then fold the doubled up binding over the edge and stitch in the ditch to secure in place.

And ta dah!  my first quilt – a highly personalised message tree sending so much love and adoration to the new little one.

DSCN2753

DSCN2755

DSCN2756

Thanks for visiting and happy sewing!

The Lesley Blouse

This fitted blouse was a long time in the making (and even longer time in the blogging!) and is named after my sewing buddy Lesley.

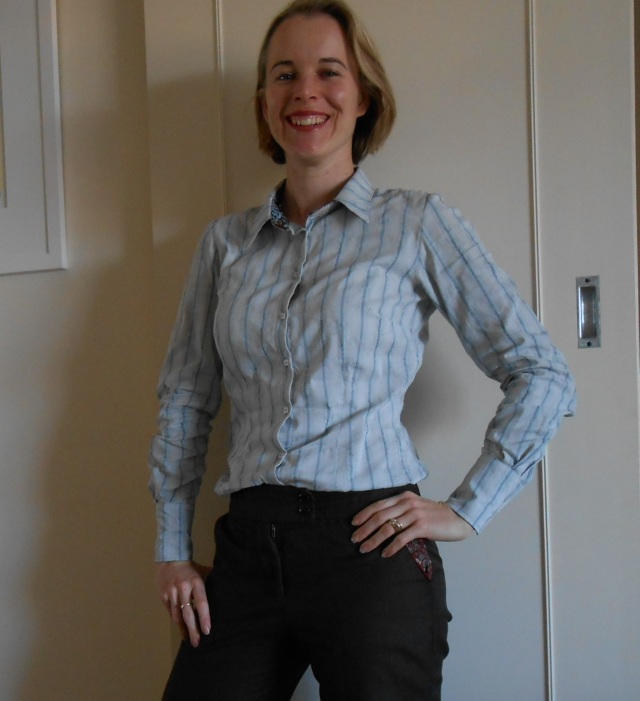
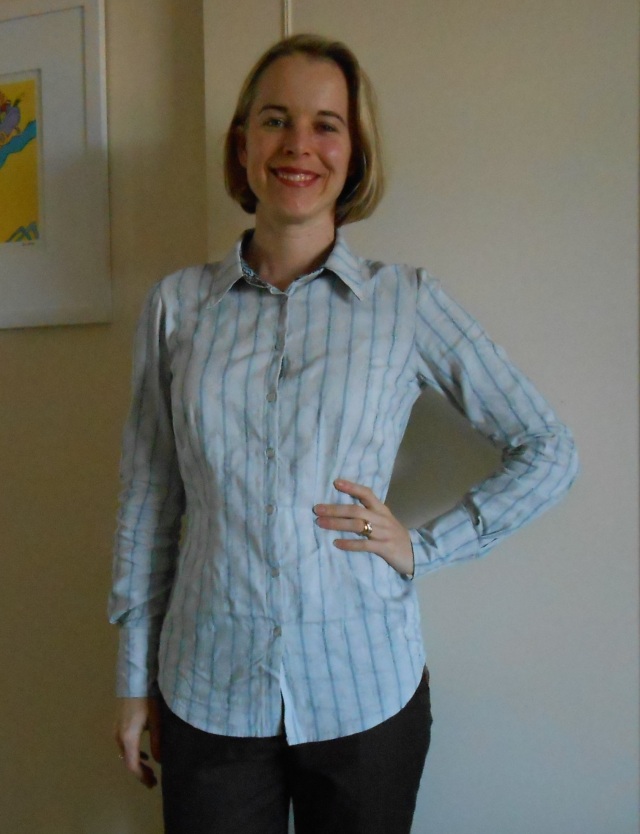
Lesley blouse_frontThe pattern is a self drafted pattern based on my fitted bodice block from my very first pattern making class at Studio Faro. But it took me a while to get my head around collars and cuffs and all the bits and pieces that go into making a button down shirt.  This is where Lesley came into her own, sending me online tutorials for various parts of the shirt and tricks of the trade.  We had a pattern making session together where we went through some of the more tricky bits.  I don’t think I would’ve endeavoured to the end without the encouragment from a fellow sewist.

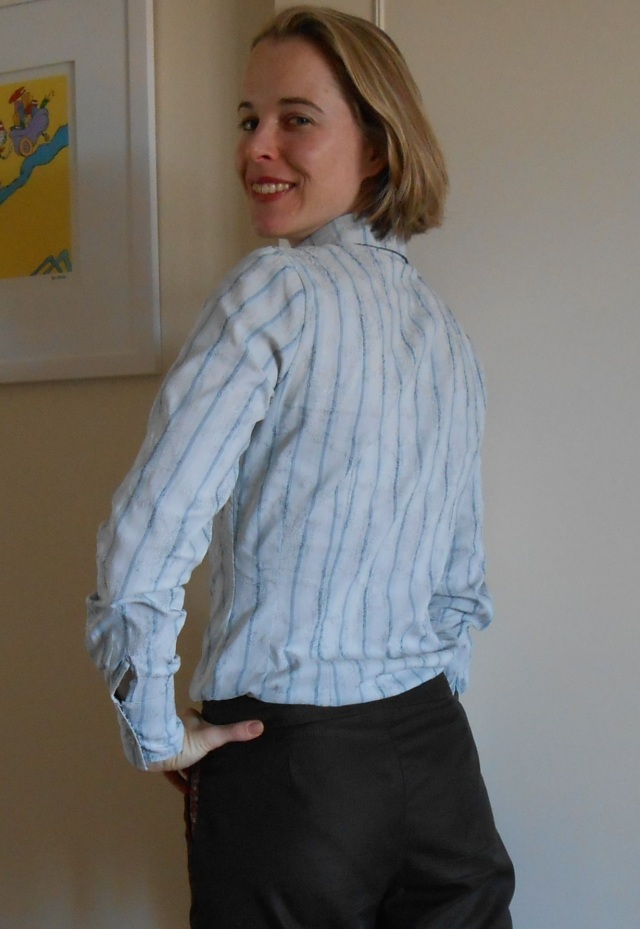
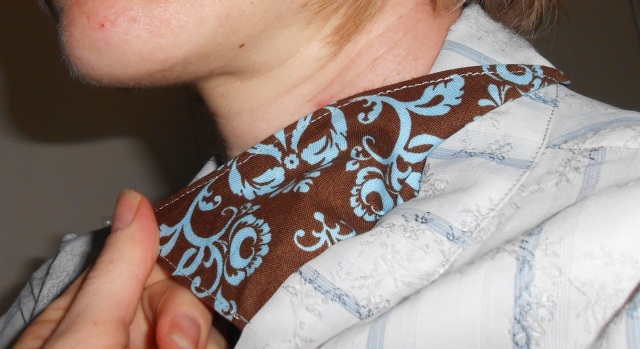
Lesley blouse_backI made this first version out of an Italian cotton with a little stretch from Remnant Warehouse and a contrast quilting cotton under the collar, the inner collar stand and in the cuffs.  I went with a fairly standard collar, a simple button stand (just folded over section of the two front pieces rather than a separate button stand) and kept all of the waist darts as per the pattern block – that’s 4 in the front and 4 in the back!

Lesley blouse_collar

Lesley blouse_collar stand

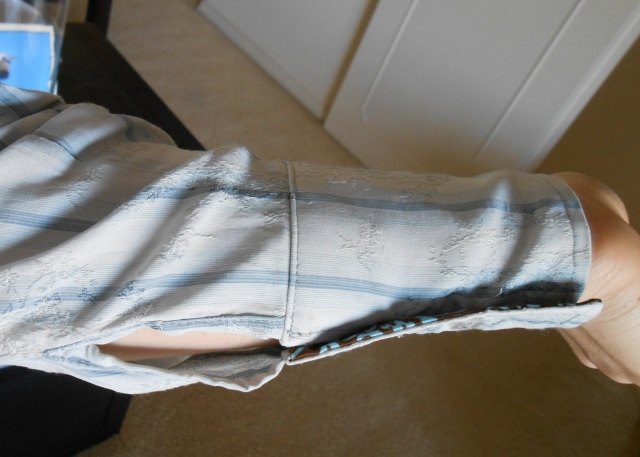
Lesley blouse_cuff

I decided on long cuffs for a more retro look but somehow miscalculated the cuff width and ended up with VERY tight cuffs.  Luckily I can still do up the buttons but I can’t slip my hands through without undoing the buttons.  Oops! I was considering doing sleeve plackets (Lesley had a good block for that too) but decided that I needed to keep it simple for version 1 otherwise it would never get made.  Next time I’ll have to tackle the placket.

Lesley blouse_untuckedI made the shirt extra long to accommodate my long body and so that it doesn’t get untucked when I raise my arms.  I like that alteration although I may need to make it wider at the bottom to get over my hips.

All in all, not a bad little attempt at my first blouse pattern.  I’d love to make it in a fun Liberty fabric or something.  But I’ll have to stay skinny to fit into it with all those unforgiving waist darts!

Pattern: My own Lesley Blouse pattern

Fabric: Italian cotton from Remnant Warehouse and quilting cotton for the contrasts

Alterations: Specific design decisions this time was the long cuff and extra length.  Next time I’ll stick with the extra length (wider over the hips), have short and WIDER cuffs and I might have a go at the sleeve placket.

Do it again: Yup… but maybe not for summer