Ziggi Sew-Along: She’s finished!

Ladies and gentlemen, boys and girls, please put your hands together as I present…the infamous ZIGGI!

There’s a hush in the crowd, the spotlights zoom in on centre stage as the thick red curtain is raised to reveal the completed Ziggi jacket.

Image

Ziggi out on the town.

Ziggi here was no small undertaking for a moderately competent intermediate sewist like myself.  There are a lot of pieces, 5 (FIVE) zips and a full lining. A huge thank you to the wonderful ladies of SewMaris and StacySews who were our fearless leaders in this endeavour and had some brilliant tutorials through some of the rougher sections of zipper pockets, attaching linings etc. There were a few steps where I think I winged it a little but I’m pretty happy with the result and am excited to get lots of wear from this sassy lady.

Image

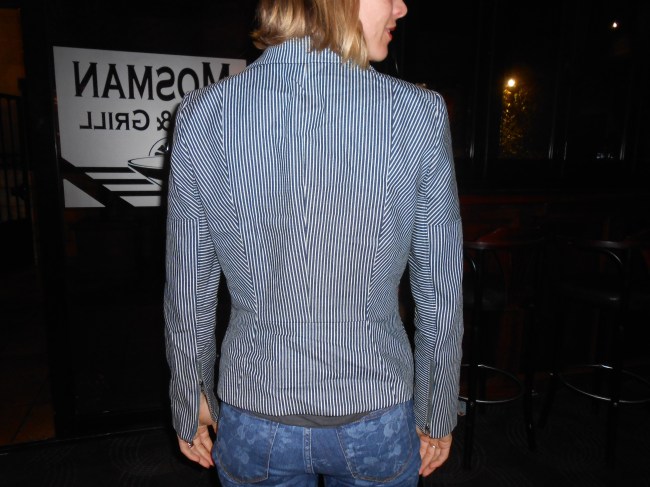
Back view:  notice the changes in stripe orientation on the sides, sleeve top and under sleeve. It’s enough to make your eyes go fuzzy!

Image

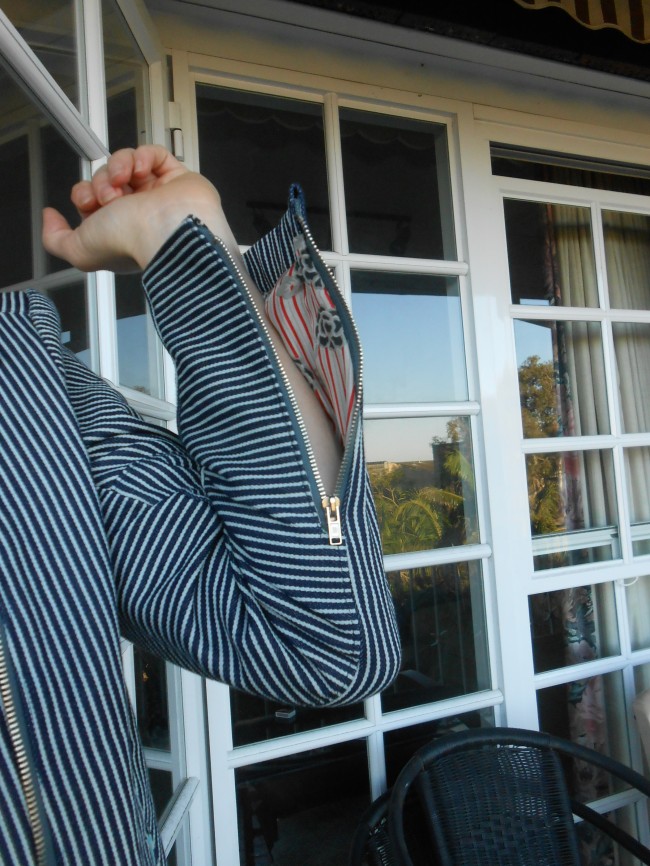
All zipped up

Image

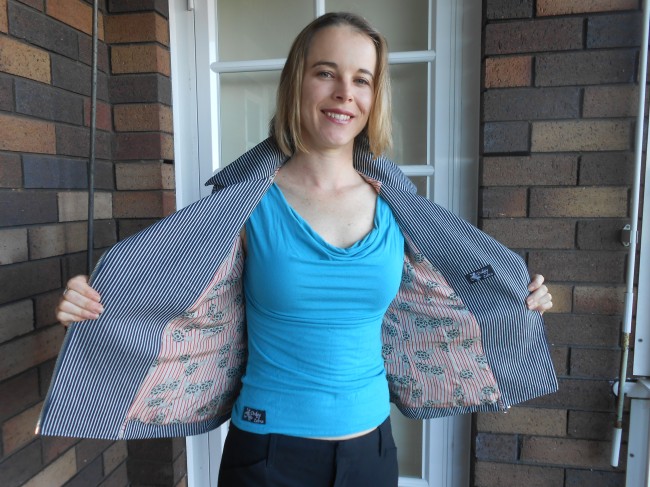
Loving the red striped silk lining with grey flowers. The cutting out of the silk was a bit of a chellenge and I wish I’d read Maris’ post about cutting out silk with paper underneath the fabric BEFORE I cut all my pieces out.  Nevertheless, we got there in the end and my striped are mostly straight.

Image

The details are what make the jacket extra special.  And I definitely learned a few tricks along the way.  Like making this zipper window using some organza or lining, clipping into the corners, folding it back and then inserting the zip. Also…ALWAYS measure your zips and the spaces your pattern is telling you to put them in…they don’t always match and you need to somehow make it work.

I like the way the bias cut side panels meet in a chevron on the side seam 🙂

Image

This project was quite an intensive one for me and I put some solid hours into it thanks to all the recent public holidays. But it feels like quite an accomplishment and I even managed to get it done by the Ziggi Sew-Along deadline!  I look forward to many happy days with me and my Ziggi.

Pattern: Style Arc’s Ziggi Biker Jacket and HUGE help from SewMaris and StacySew’s Sew-Along

Fabric: Outer: Blue and white striped denim. Lining: red striped silk with grey flowers. Both from The Remnant Warehouse, Botany Road, Sydney

Alterations: I made a full toile and had it fitted with the help of Anita. From that I took it in at the back waist, widened the shoulders a bit, lengthened the arms by 2cm and lengthened the body by 1.5cm. I also rearranged the grain lines to get the stripe orientations I wanted and had to redraw the pocket patterns to match my zips.

Do it again?: Not just yet.  One Ziggi is enough for the moment…but I could see it in a nice bright wool fabric.  I don’t think I’ll tackle leather just yet.

Did you make a Ziggi?  What was your experience?  Check out some of the others at Flickr.


Ziggi Sew-Along: Getting started

Back in February I decided to join in the Ziggi Jacket Sew-Along hosted by the very talented and incredibly patient ladies from Sew Maris and Stacy Sews. I was very diligent and ordered the pattern, picked out my fabric from The Remnant Warehouse and found all FIVE metal zips that I needed. I even got as far as pre-washing my denim TWICE …but after that I got a bit stalled.

Image

 Yes, this pattern is a little out of my league and that’s definitely more zips than I’ve ever put into a single garment.  But I’ve wanted to do a biker jacket for so long now, this pattern looks awesome and I am am hoping that under the guidance of Maris and Stacy I can make it through.  And I’m always up for a challenge, right?

Since I’d gone to all the effort of getting all the right bits and a jacket is quite a special piece, I wanted to do it right. And so took the extra step of making a toile – Ok so I didn’t do it 100% right because I used an old sheet for the toile rather than ‘similar weight fabric’ as I know I’m supposed to.  But I wasn’t about to go buy and wash MORE denim and I figured any toile was better than none.  And I’m glad I did make up a mock jacket as I picked up a few fitting issues that, thanks to Anita my pattern-making teacher, I managed to translate back onto the pattern for a more personalised fitting.

Image

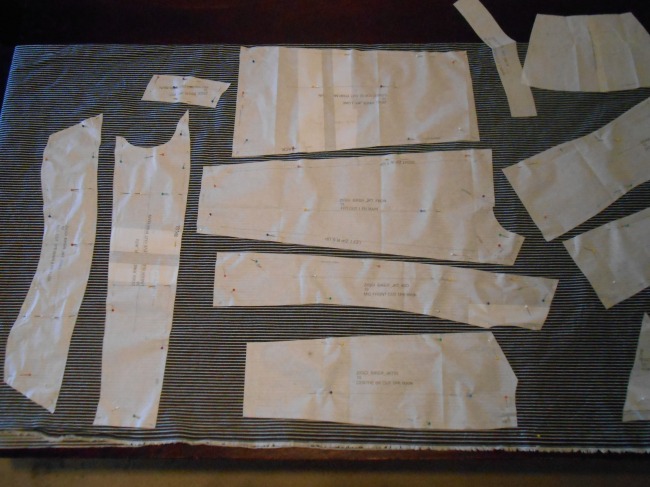
Next up was figuring out the cutting out of all the hundreds of pieces.  Since I had chosen striped demin, there was added complexity as I had to work out the orientation of the stripes that I wanted on each of the panels.  I haven’t gone completely wild but I’m excited to see how it turns out.

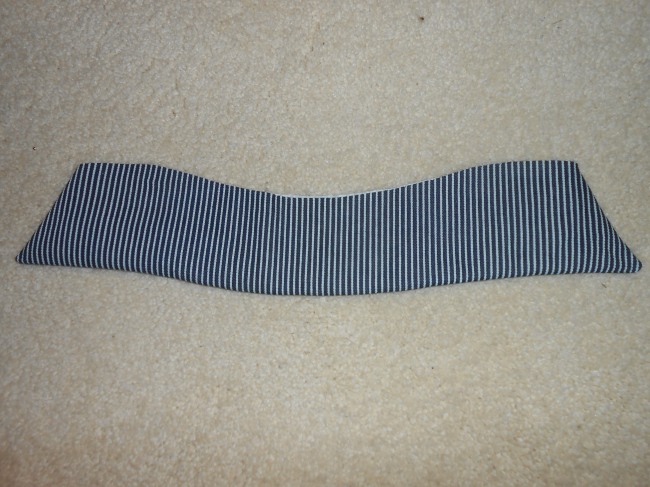
When I FINALLY got to actually sewing on my real fabric,I was over the moon. With the help of Sew Maris’ brilliant tutorial on the collar, I now have a collar!  Woohoo!

Image

I know…doesn’t look like much does it?  But I feel like it’s taken a long time to get to this point AND I’ve actually started :-). 

Needless to say, I’m miles behind the others on the Sew-Along. Maris and Stacy are galavanting around in their most beautiful completed jackets and I’m still fumbling around with zips and pockets. In fact, I was hoping to get a little further tonight but, as pointed out by Maris, the pocket bags don’t quite match the zip lengths I bought :-(.  So I’m going to have to redraft and recut a few more pieces before I can get going again.

Oh well, Onward and upward!

From the Back of the Closet: The Farm Girl Shirt Dress


Image

My ‘From the Back of the Closet’ series will cover some of my older pieces that are now well worn and well loved but haven’t yet made it onto my blog.

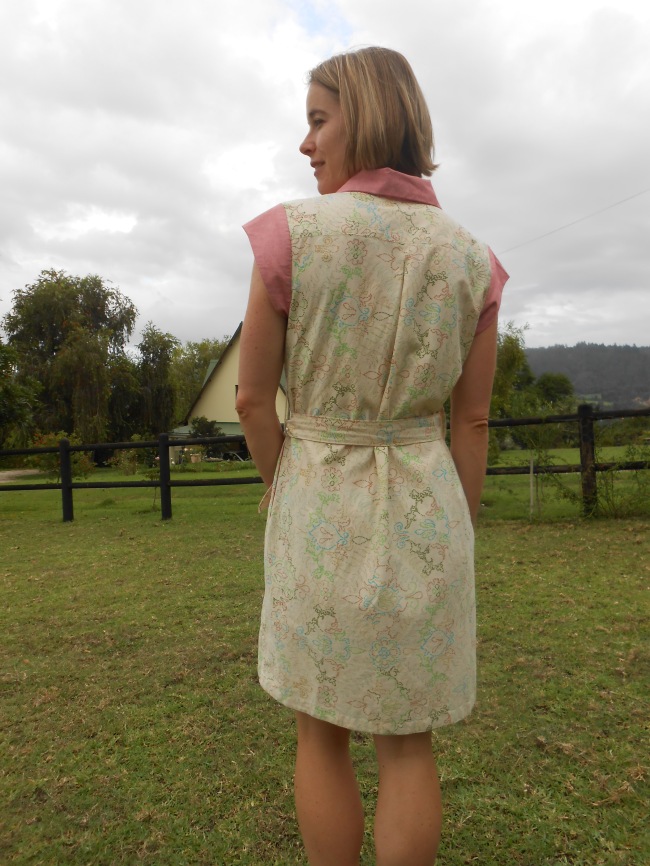
This good work horse (hee hee) of a dress was made a while ago when I came upon Grosgrain FabulousFrock by Friday from 2010 that stepped through the making of simple but fun shirt dress with belt. The pattern is a free one from Bernina (the original link seems to be broken so I’m not sure if the pattern is still out there in cyberspace) but I changed the sleeves to capped sleeves and added pockets. (Gotta love pockets in a dress!)

Image

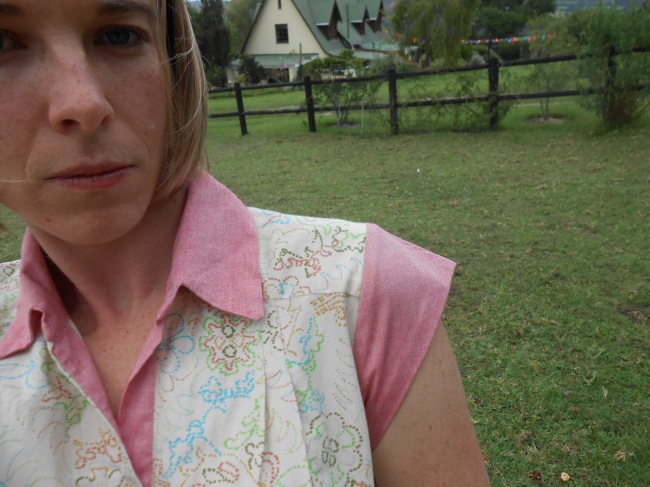
The fabric I used is a gorgeous printed Japanese cotton from Tessuti.  I bought it a while ago but couldn’t find the right project.  This opportunity seemed to work.  And with the contrasting solid salmon coloured cotton (from Remnant Warehouse) for the collar, sleeves and other details helped to frame the more subtle main fabric. I also enjoyed picking the buttons :-). I was a bit worried that I would look a somewhat washed out in this creamy colour but I think it’s ok.

The photos that were posted on the sew along were really helpful in figuring out the different steps.  The most difficult part was the placket (button stand) and neither the pattern instructions nor the Frock by Friday’s photos and tips could decipher it for me.  I just couldn’t understand how you could make a cut in the fabric, add on a piece with seemlingly no seam allowance and get the edges to meet up!  I was about to give up and start all over again when the wonderful world of bloggers helped me out.  I found Nikki from The Girl Who Quilts with a tutorial explaining a solution to my EXACT problem.  I was thrilled and finally got over that hiccup to get the dress done.

Image

Image

This dress is a great weekend dress and good for travelling because it’s very comfortable and you can layer it up (leggings and boots in winter) or down (as is in summer).

Image

Pattern: Bernina’s free shirt dress pattern (whose link seems to have vanished) and Grosgrain Fabulous’ Frock by Friday

Fabric: Printed Japanese cotton and a salmon coloured cotton for the contrasts

Alterations: I changed the sleeve to a more shaped capped sleeve (based on Simplicity 2282). I also added pockets . I initially had the idea to make the skirt a bit fuller but this didn’t turn out too well so I cut it back to the original design.

Do it again?: I would consider making another shirt dress but I might try a bolder fabric and I want to see if I can get the fuller skirt idea to work.

PS. The photos were taken at my mom’s beautiful home in South Africa.

PPS. I don’t suggest walking into a horses’ paddock wearing sandles!  I was lucky…but don’t try it at home

PPPS. One last horsey face…

Image