Me-Made-May 2024: Let’s Begin

I discovered Me-Made-May, a fantastic sewist challenge created by Zoe from ‘So Zo, What do you know?’ years ago and it’s been a whole decade since that first, and only, attempt. I loved the challenge of wearing something I’ve hand crafted for each day of the month but what with life, three children, moving country, four different demanding jobs and just all the admin of adulting, I haven’t had the foresight or mental bandwidth to do it again …until now. So here goes!

I, Mary of DodgyZebra.wordpress.com, pledge to wear at least one me-made garment every day for the month of May 2024.

I love making clothes and I love wearing the clothes that I make. But there are definitely winners and losers and as I endeavour to be more thoughtful about the clothes I make, I hope this challenge helps me better understand and articulate what it is about each piece that I like and don’t like. And in doing so, I hope to create more of the clothes I love to wear and fewer of the pieces that frustrate me and get shoved into back-of-the-closet-purgatory,

Day 1: Bat wing top:

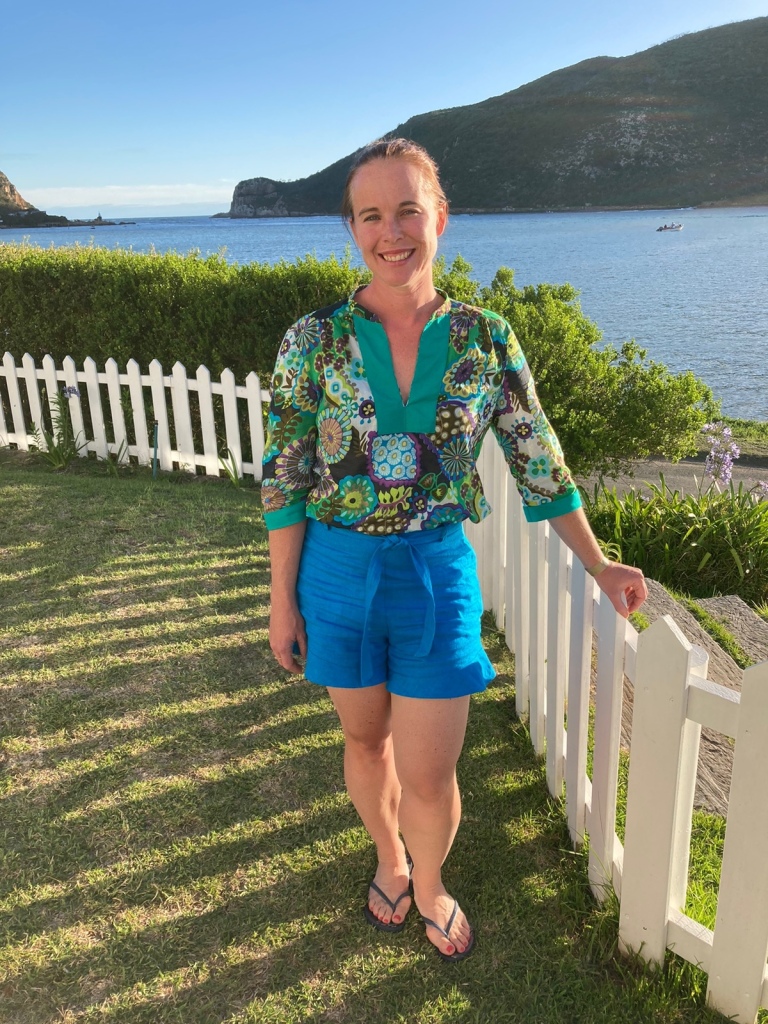
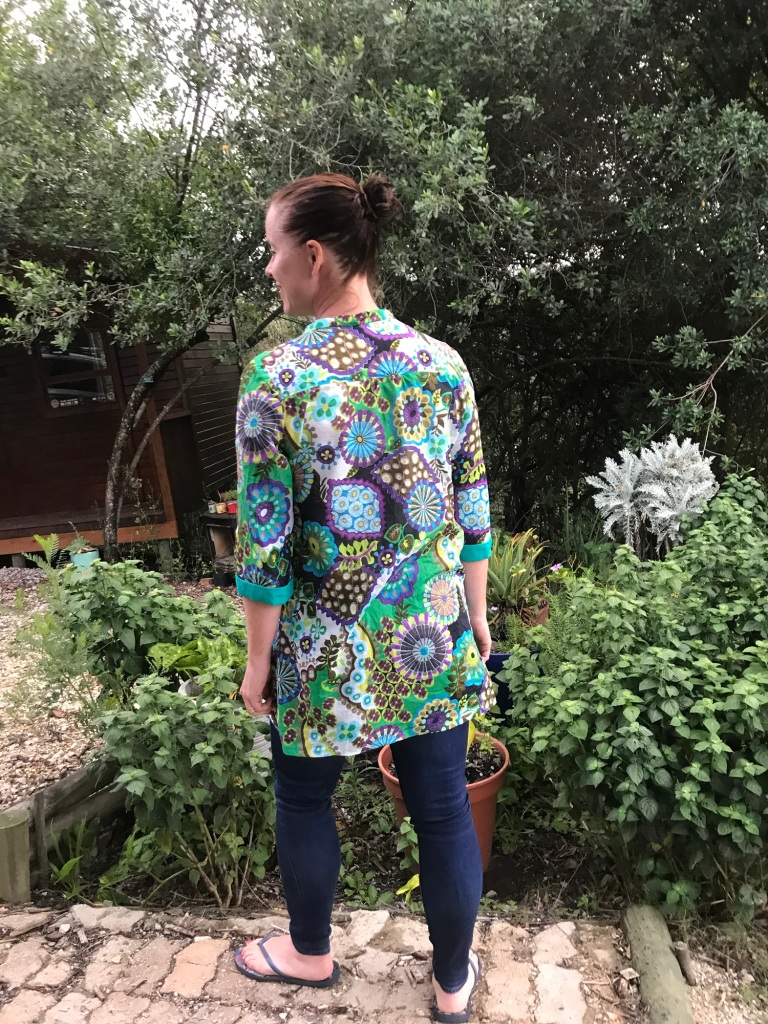
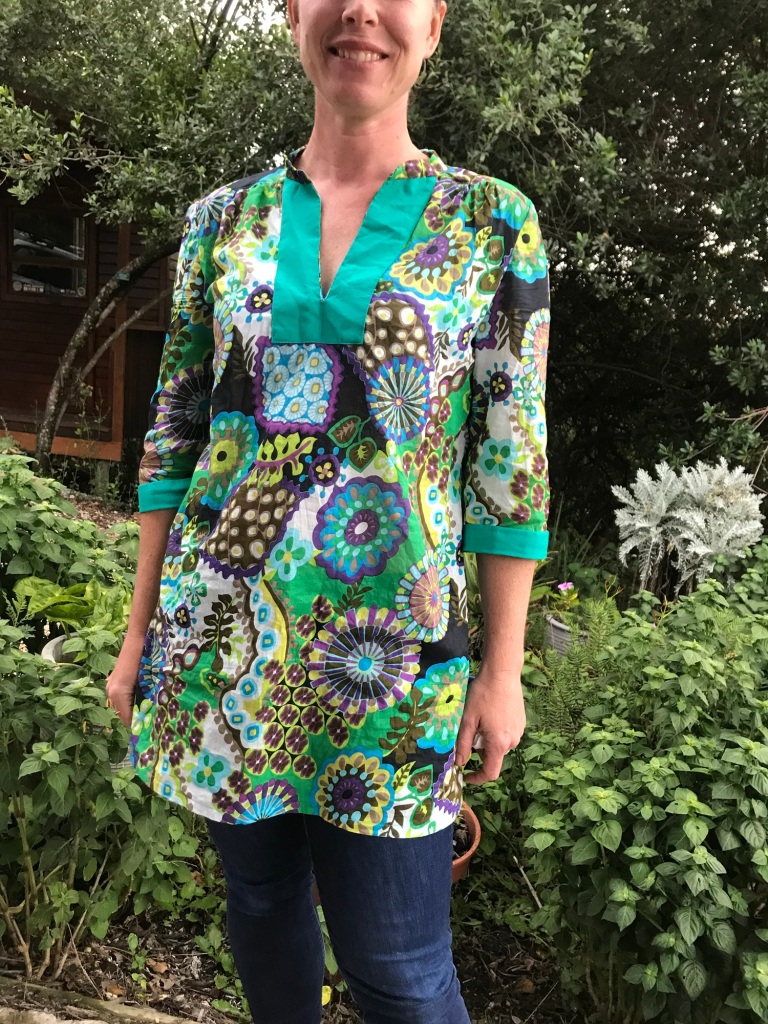
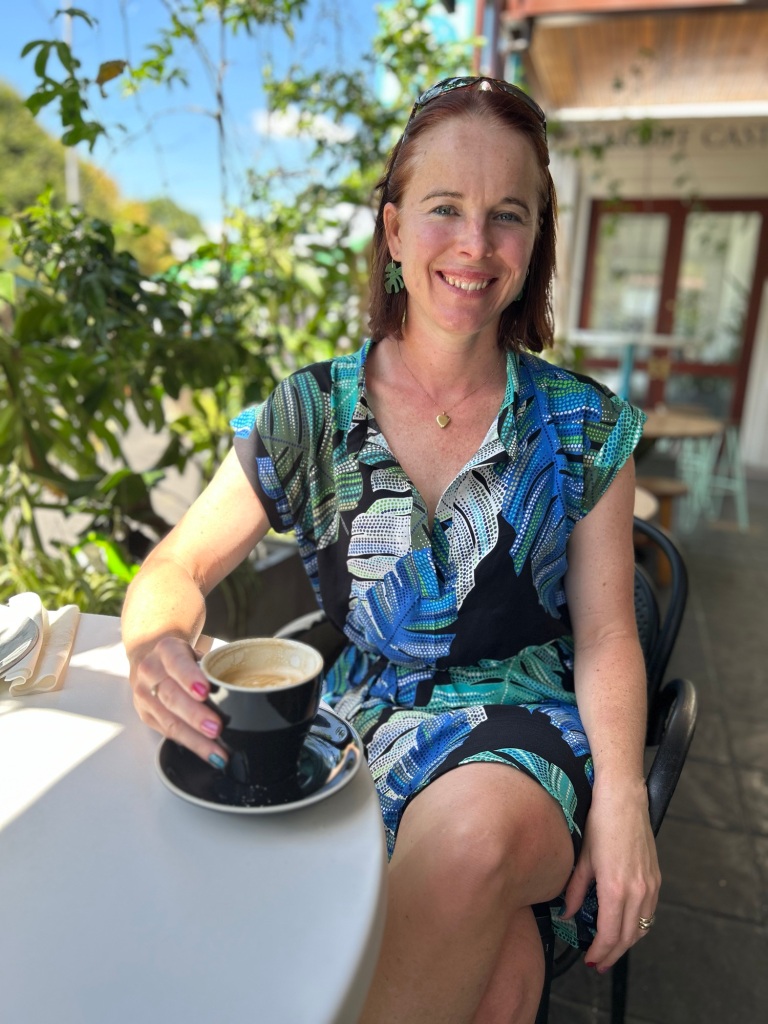
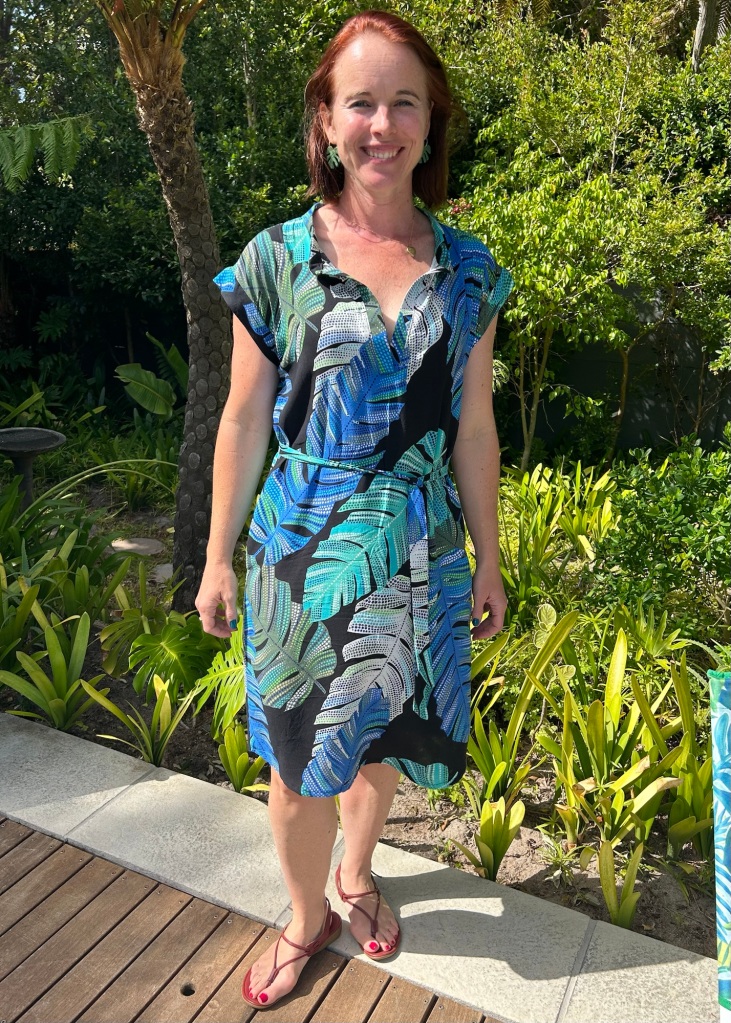
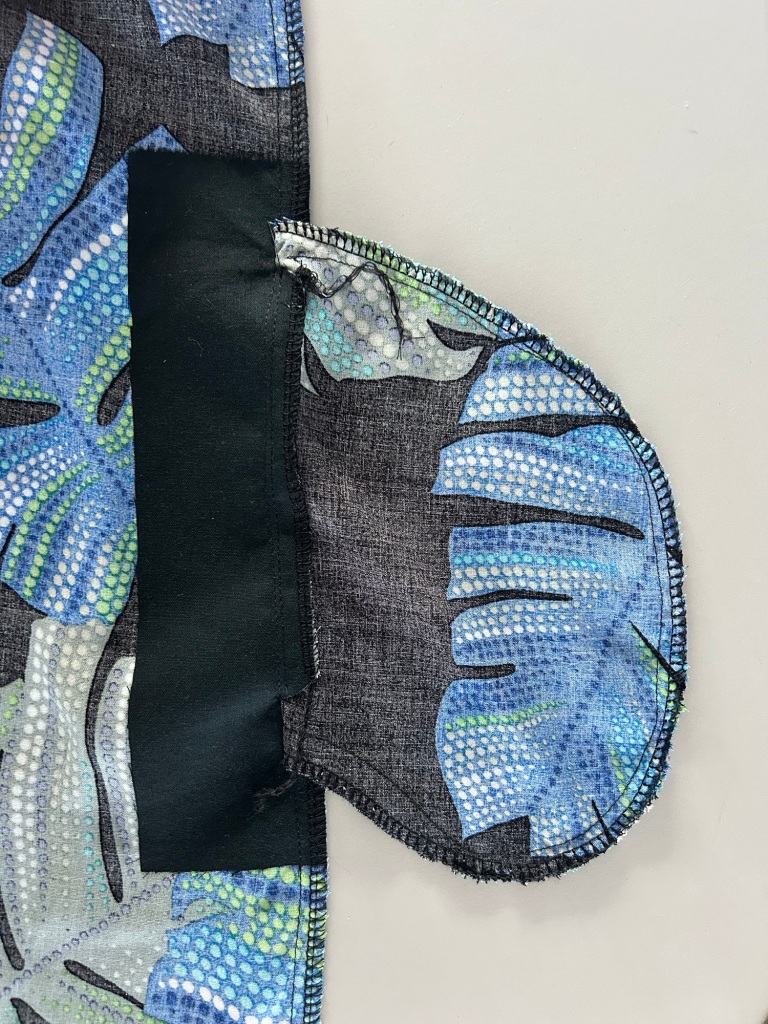
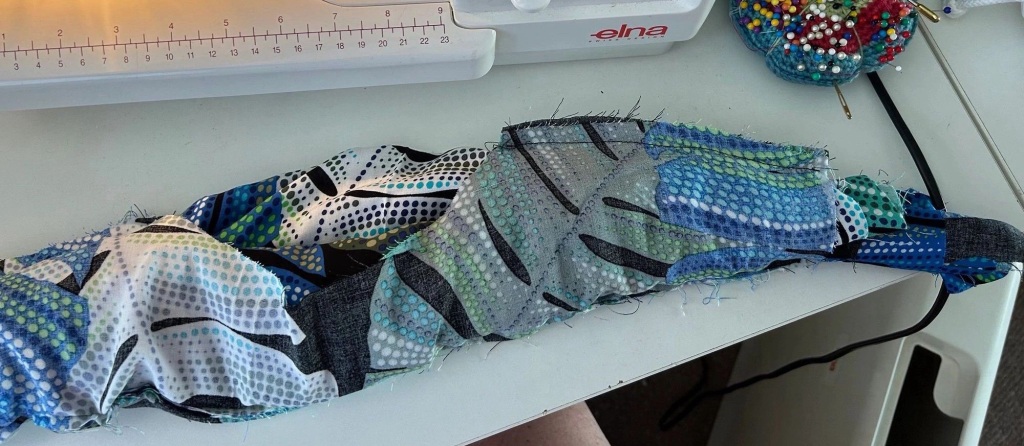
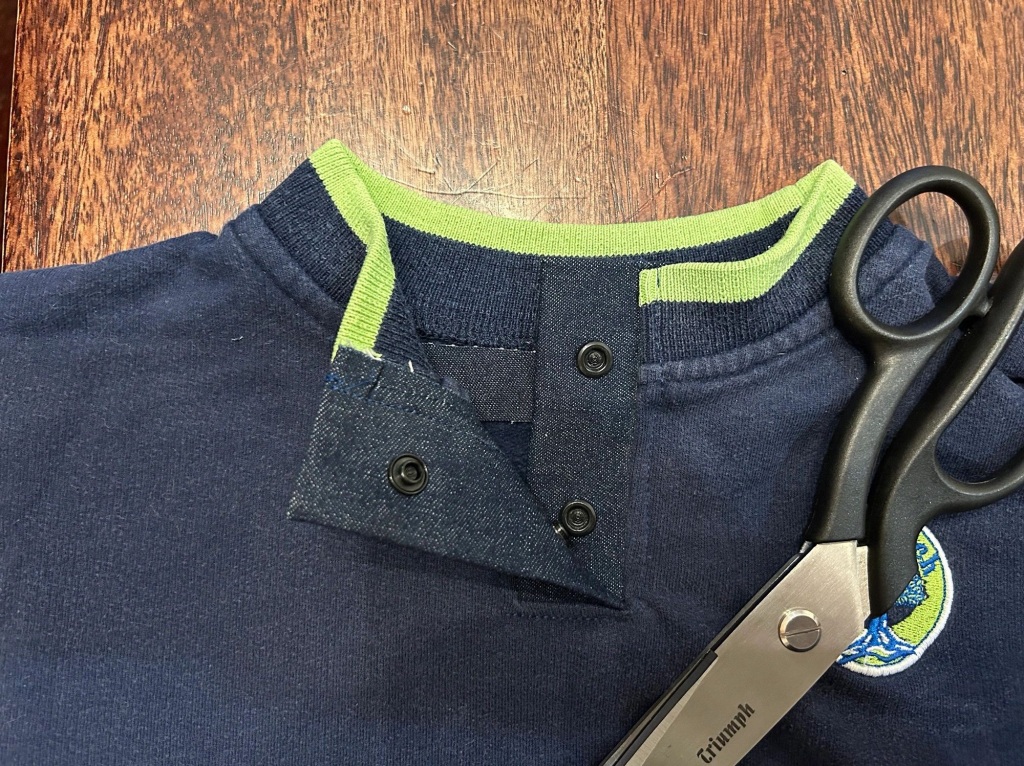
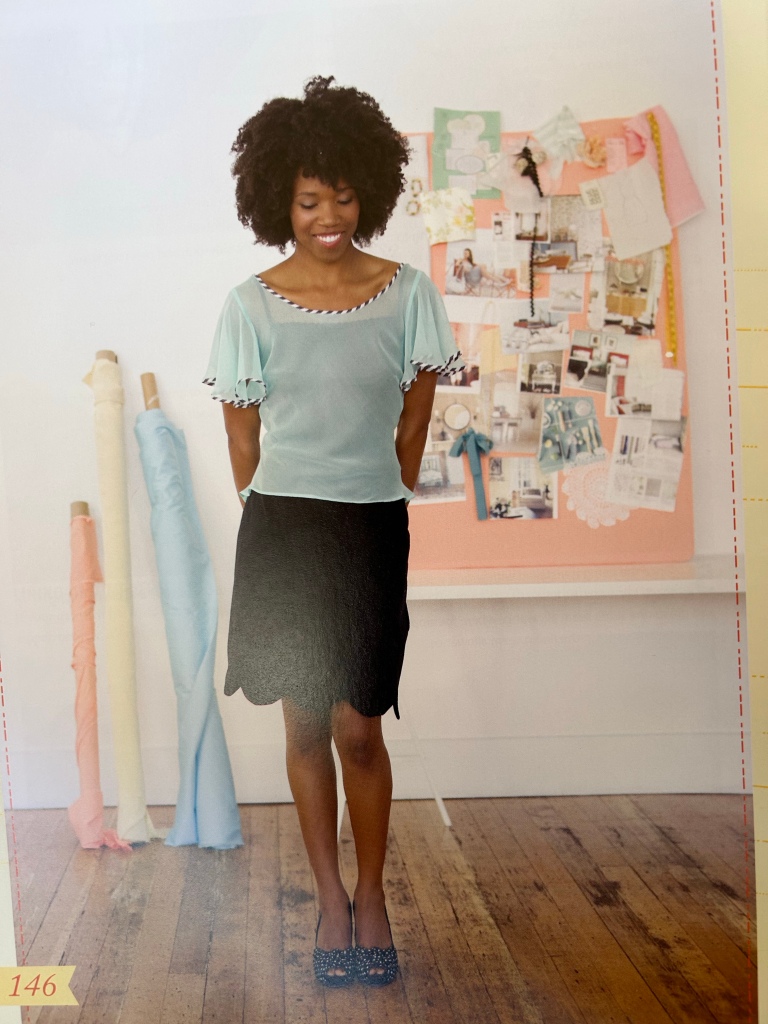
What I like: Love the vibrant colours and the combination of woven in the front and knit in the back. I like the general shape and the simplicity. I like the wide binding / narrow facing of the woven fabric – it’s a clever way of dealing with finishing off a neckline for a knit fabric.

What I don’t like: I don’t like the way the hem curls up in the front centre. I really don’t like the synthetic, clingy feel of the polyester woven front fabric (despite the great print) and I don’t like the way I am constantly adjusting the neckline to stop choking me.

This is starting off very critical, but I think it’s good. If I’m challenged to wear a wider variety of the clothes I make, I need to know why I don’t wear them more often.

And so Me-Made-May 2024 begins. Here’s to a month of wearing and sharing.

Summer tunic: New Look 6076

The garden shirt that I made years ago became such a summer staple that I wore it to shreds and needed a replacement. I have also, over the years, increasingly appreciated the value of longsleeve summer tops to protect your arms from the harsh sun.

My second attempt at the New Look 6076 tunic started a looooong time ago. I had beautiful lightweight printed cotton in greens and purples that was perfect. For the contrast placket, I originally chose a lime green satin but this is where the trouble began. In trying to press the placket in place, I melted the satin into a big mess and gave up on the whole project in a huff. It wasn’t until years later (literally), that I unearthed the project and tried again – this time with a teal cotton that worked much better and behaved during ironing.

For this version, I went with the three-quarter length sleeves and the tunic length. I like that I can wear it as a shirt or tunic and I’ve already enjoyed summer days wearing this creation.

I can wear the tunic tucked into shorts for a shirt-like look. The three-quarter sleeves are great sun protection.
The pattern is a fairly classic old-school design. I didn’t add the fake pockets but I included the cuffs in the contrast fabric
Worn as a tunic over skinny jeans or leggings gives a completely different look.
It’s also great to throw over a swimming costume after a swim at the beach

Fabric: Lightweight printed cotton in funky purples and greens; contrast teal cotton after a failed attempt with lime green satin.

Pattern: New Look 6076

Alterations: The only change was I didn’t put the fake pockets on.

Do it again? This version is already showing some wear and tear from a few summers of use, so if I find nice summery lightweight cotton again, I may need to make a replacement. Next time I light broaden the shoulders slightly as that is where it is pulling.

Two summery shift dresses: McCall’s M5464 & M5716

I love a shift dress – such an easy, smart work outfit and depending on what fabric you use, it can be fun and floral or conservative and corporate. In an attempt to find ‘the perfect shift dress’ I made two summery shifts in different patterns. Both patterns have a single front piece with no waist seam but use darts in different ways to create the shape. Quite a fun pattern puzzle exercise.

The first one was a remake of McCall’s M5464. This pattern was the first pattern I ever made in a sewing class I took many many years ago. The princess darts are classic and create a really lovely line. I used a printed cotton that I bought in San Francisco ages ago and couldn’t find a pattern that fitted. The fabric is maybe a little too lightweight for this type of dress but it works and looks good.

The second shift dress is McCall’s M7516 which comes with patterns for pants and a jacket too. This shift uses bust darts and waist darts to create the shape and the slash at the neckline makes for an interesting feature. This fabric is a heavier weight cotton with bright floral print. The weave is almost like a soft canvas and it worked well for this type of dress.

These are the two patterns. Both quite old school from McCall’s and follow a similar structure.

A simple zip up the back and slit finishes off the back. For these types of dresses and skirts, I have started including a leather triangle at the top of the slit to secure the stitching and create a little something special at the back. I quite like this little feature. I used it on the other dress too but don’t have a photo included here.

For the M5l716 floral dress, the back gapes a bit so next time, I’ll need to adjust slightly. The pattern is designed to be a fully lined dress plus neck facings. I didn’t think a lining was necessary for this version so I just did the facings and used bias binding around the arm holes.

For both patterns I added 2cm at the waist to account for my long torso. I thought I would need to add more width down the side seams but ended up taking it away in fittings.

The front slash is quite a nice feature although I haven’t mastered the art of sewing a slash. I worry that it will pull out and look ugly after a few washes. Any advice is welcome!

Both dresses came out well and the patterns both have their benefits. I wear the dresses a lot and often get comments.

Patterns: McCall’s M5464 and McCall’s M5716

Modifications: For both I added 2cm at the waist. I also added width at the side seam for M5716 but in the end didn’t need it and I didn’t do the full lining but just used the facings and bias binding at the arm holes.

Fabric: A medium weight cotton print with leaves and flowers in browns, yellows and oranges. For the second dress I used a heavier, almost soft canvas, cotton with bright coloured daisies.

Do it again?: Both patterns have served me well and they are the type of style that never goes out of fashion so I’m pretty confident these ones will come out again. Maybe next time I’ll opt for the more ‘conservative and corporate’ look.

The Pool Party Dress

I just finished this dress and wore it to a pool party this weekend so I wanted to share it straight away! I bought a dress in this style years ago and I love it and wear it all the time during summer, so of course I’ve had a plan to copy the pattern and make one myself for a while now. On Christmas day the project finally began when, to the amusement of my in-laws, while the kids were building their new Lego projects and constructing their robots, I pulled my own project onto the coffee table where I copied my dress pattern and proceeded to cut out the fabric. The sewing had to wait until I got home.

It’s a pretty simple design with a front placket – I’ll need to add some buttons but haven’t done that yet, a back yoke, little strips around the arm hole for sleeves, pockets and a curved hem. I’m pretty happy with how it turned out and I’m sure it will become a summer staple.

The fabric is a rayon with large banana leaves in blues and greens that I got from Urban Rag in Wynberg. It shouts “SUMMER!” and it was relatively easy to work with and I’m enjoying wearing it.

Given that I drafted the pattern myself off of an existing dress, there were obviously no instructions and I had to research and remind myself on some of the tricks and techniques for the details. This all takes time and brain power and it makes me grateful for the detailed instructions provided on some of the great patterns I’ve been lucky enough to use.

Gotta love pockets in a dress! For the pockets, I remembered that the Mirri Jumpsuit had a very neat and secure pocket installation and so I copied their method. The piece of interfacing helps to add structure to the opening, however I made mine a bit wide so it adds bulk to the hips. So next time I need a narrower strip of interfacing! For the yoke construction I referred to this lovely clear tutorial from Charlotte Kan. I had forgotten that great ‘sausage’ step where everything gets squashed into the yoke pieces and you think “This can’t possibly work” and then you pull it out and “Ta duh!” it’s a perfectly sewn yoke with all the seam edges neatly inside. I love those sewing moments.

For the placket, this video from Taylor Nour helped guide me.

I used this same technique when I modified my son’s school sweatshirt to fit over his enormous head!

I’m very happy to add this fun summery dress to my wardrobe. Long live summer!

Fabric: Black rayon with banana leaf prints in blues and greens. From Union Rag

Pattern: Self drafted pattern off a store bought dress of mine.

Alterations: I tried to stick to the original but my hem is a bit shorter, the placket and sleeves are a bit wider and I haven’t added buttons…yet.

Do it again? I could see myself making another one of these in a different fun fabric.

Gifts made by me

I love making handmade gifts for people. Not only is it a cost effective option (mostly) but it also shares a lot more thought, appreciation and love than a quick store bought gift.

This post is just a snapshot of some of the gifts I’ve made over the years. Enjoy!

Zip bag for a ballet raffle fundraiser: I have made many, many (I want to say hundreds) of zip bags over the years. It’s a great gift option that you can make out of all sorts of fabrics and you can never have enough of them!

Crochet basket: My friend in France taught me this technique and gave me the tshirt yarn while we were on holiday. It was a great holiday project and a fun gift to myself!

Christmas bunting, crackers and Advent calendar: Sewing and making Christmas goodies is always fun and rewarding. These decorations get used every year. The reusable crackers are particularly fun to fill with personalised gifts and jokes, and I always feel a bit smug not creating a pile of rubbish from normal crackers. And the bunting uses small triangles and is a lovely alternative to tinsel which always makes me sneeze.

His and hers aprons: I made these for a friend’s wedding based on the design of very fancy (expensive) aprons that were on the gift registry. I found lovely complementary striped cotton homeware fabric that is made locally and really enjoyed creating these. She was overjoyed with them and I love thinking of her cooking in my handmade gift.

As an aside, my first choice of fabric was a wild, very colourful option but, thanks to the advice from another mutual friend, I went with this more sophisticated, trendy colour pallet and it was definitely the right way to go.

Memory bunting: I made two strings of bunting for special birthdays for two of my close friends. Each triangle of fabric is a scrap from a project that means something to me and charts a history of our friendship: teenage parties, weddings, the birth of our children and many other big and small events in between.

Teachers’ gifts and lockdown cushion covers: Every year teachers’ gifts puts me in a mild panic as I try to think of something meaningful, affordable and something the kids can get involved in. Zip bags are a great option and recently I’ve got the kids to decorate the lining which adds a nice surprise inside.

The cushion covers were fun projects we made during lockdown.

Banner bags: For two colleagues that retired from our department at work, I made bags out of banners as farewell gifts. The images on the banners are beautiful and it was fun to upcycle the outdated signs into something useful that carries memories. The plastic material was quite difficult to work with but the final product turned out nicely.

Cushion covers painted by kids: These were a team effort and fun family project for the kids’ preschool teachers. They are still in the Reading Corner.

Hand made gifts are a great way to show you care and share love and creativity. I’d love to hear about some of your crafty gift ideas.

Taffy Blouse: An exercise in patience

Most of the clothes I make are quite structured using “well-behaved” fabrics. I tend to avoid sheer floaty fabrics mainly because they are a nightmare to work with. But when I saw the Taffy Blouse pattern from the Collette Sewing Handbook and a piece of sheer fabric in my stash that shouted “Pick me!”, I decided to take up the challenge.

I knew that cutting the sheer fabric on the bias would be difficult, so I sprayed it with hair spray to try to stabilise it a bit. I think it helped. I used French seams which was the right choice for this kind of fabric and created some strength in the seams with a very neat finish. It does take time though as I needed to pin, sew, trim, pin again, sew again for each seam.

The big, floaty sleeves and neckline are finished with a self made bias binding. And this was a major test of my patience! For starters, I needed to make a lot of binding and then had what felt like metres and metres of fiddling to get the binding neatly sewn on the edges. Luckily I attempted this while on holiday so had minimal distractions and could just immerse myself in the almost meditative task.

Despite the patience required and the frustration of sheer fabric and lots of binding, I am happy with the finished top and I like the way the pink binding colour pops. The neck line is very wide so falls off my shoulders. Maybe it’s supposed to do that but I added little ribbons with poppers to hook around my bra straps.

The Collet Sewing Handbook has some great tutorials and patterns. Tracing out the patterns is a bit tedious and requires lots of concentration to stick to your line. But it was a fun challenge.

Pattern: Taffy Blouse from Collette Sewing Handbook

Fabric: Sheer brown floral from my stash; feels silky but it’s probably polyester

Do it again?: Probably not. I’m not such a glutton for punishment!

Pussy bow blouse

I love the resurgence of the kitty bow blouse style – a classic from the 1970s and 1980s. I looked through various pattern options but for most of them the sleeves were too puffy or the bow too big and I just couldn’t find something that I liked. Then I found this great Pussy Bow Blouse pattern from Sew Over It.

The fabric is a beautiful lightweight printed cotton that I got in France last year with the idea to make a summer dress but it leapt up and said “Use me for the Pussy blouse!”.

I chose the lower neck option and the pattern came together easily with some simple solutions to cuffs and neck tie installation. The one design element I didn’t really understand was the seam down the front of the shirt. Maybe it’s to allow for a neat folded seam at the neck tie interface but my personal feeling is that you could do away with the centre seam and use a little piece of bias binding to neaten the gap between the two sides of the bow. Nevertheless, I followed the pattern but I think if I made it again, I would try it my way.

I haven’t used patterns from Sew Over It before but I enjoyed the simplicity and clear instructions.

The shirt is easy to wear tucked in or out. The only closures are the buttons at the cuffs so it’s super simple. And I LOVE the green fabric.

Pattern: Pussy Bow Blouse from Sew Over It

Fabric: Lightweight green printed cotton

Do it again: I might try the higher neck version in a bright solid colour for next winter. If I do, I will see if I can avoid the seam down the front and maybe make it a bit longer with more shape at the hemline.

Three pairs of Pietra Pants

In my mission to make the perfect pair of pants I have had some dismal failures and I’ve learned a fair amount about what sort of pants do – and mainly DON’T – look good on me. But through the trials and tribulations, I came across this awesome pattern: Closet Core’s Pietra Pants pattern miraculously combines a great fit with comfort and style. So of course, one pair wasn’t enough and I ended up making three!

The first pair I made was the wide leg version made from a navy blue linen. It is the first time I’ve worked with linen and it feels so good and is pretty easy to work with! It does fray quite easily but I used my overlocker to finish the edges before sewing the pieces together and that helped.

The pants are designed to fit at the waist and the front of the pants have a flat, fitted styling with slanted pockets that are integrated into the front panels.

One of the fantastic features about this design is that even with a flattering, fitted front, there are no closures needed because the back is elasticised. This also means the pants are very comfortable even with a high waist. I did, however, make the mistake of not making the elastic tight enough so sadly this pair falls down and is a bit annoying. The elastic is fully integrated into the pants so it’s very hard to make it tighter after the fact. I also learned an important lesson – wide leg pants are not very flattering on me. I thought I needed more width in the pants to hide my short muscular legs but turns out that might not be the best solution and I should just go and show off my legs!

So the next pair was the shorter tighter version and I much prefer the fit. I used a piece of grey tartan-ish fabric. It’s a synthetic material so not my favourite but they are fun and comfortable to wear. The shorter pants length isn’t my normal style and I struggle to find shoes to wear with these pants and I can’t decide if they are winter or summer pants!

The fit at the back was better this time with a tighter elastic.

Once I had proved that the fit was good, I decided I needed to go wild! I chose a fabulous piece of cotton that my fair godmother had given me and I made my third pair of Pietras.

I love how these turned out! They can be dressed up or down, the waist is slightly tighter and I made the fit over the hips a little closer too.

Whenever I wear these, I get compliments and they make me smile.

They even got shown off on our trip to Greece earlier this year!

Pattern: Closet Core’s Pietra Pants

Fabric: Navy blue linen, grey synthetic tartan, black and yellow cotton print

Do it again: The shorts could be fun for summer 🙂

Winter PJs for Mom

My dear mother has a collection of sleepwear that leaves much to be desired. Typically they are stretched cotton knit nighties with cheesy slogans like “sweet dreams” emblazoned across the front. She has often admired my Carolyn Pajamas so I decided it was time to make her some decent pajamas as an early birthday present before a recent trip. The very special thing about these PJs is that for the fabric, I upcycled an old cotton sheet that she had cherished years ago.

The sheet I used was a hand-me-down from my mom that she had received when she was first married. It is a rather busy print but quite fun and I thought would make great pajamas especially as the cotton was soft from years of use. The great thing about using a sheet for sewing is that it is really wide and so your pattern placement options seem endless. The tricky thing about using an OLD sheet is that you need to be quite clever about placement to avoid the more used middle section of the sheet. For some specific pattern pieces like the cuffs, I used a matching pillow case as the fabric was in better condition. I used self-made blue piping along the edges and cuffs. I think the piping really brings the whole thing together.

Once again I used Closet Core’s Carolyn Pajamas pattern, this time in the long sleeve version. This is such a great pattern. It’s classic, it’s classy but you can have fun with fabric choices and piping. The step-by-step instructions are great and even though it feels a bit overwhelming in the beginning, it comes together relatively easily. The fit has worked out really well (I did add lengthen the sleeves a bit to accommodate my mom’s long arms) and the report back is that they are very comfy to sleep in.

…They’re also good to sing Elvis songs in!

Pattern: Closet Core’s Carolyn Pajamas

Fabric: An upcycled cotton sheet

Do it again: I love my summer version and I might need to make myself a winter pair now :-). Or maybe a night shirt hack?

Edith gets a makeover

Back in 2014 I reupholstered and gave second life to a “Gossip chair” that I found on the side of the road. I named her Edith and she became a much loved piece of furniture in our house. Time and use took its toll on the green and yellow vintage silk and it was time for a makeover.

I was using Edith as my work-from-home desk chair and, together with kitty claws, she was really looking quite sad. The first step in the makeover was to carefully remove upholstery tacks and hundreds of staples so that I could use the fabric pieces as templates and leave the wooden frame (mostly) free of sharp metal pieces. My 5 year old was a very diligent helper pulling out many a staple with his trusty pliers.

The structure of the chair is still strong and I did my best to keep the underlying layers intact. We did have a minor issue of breaking the wooden dowel holding the armrest in place. Thankfully my handy hubby helped fix that at the end of reconstruction.

After removing all the fabric pieces, I laid them out on my new fabric to choose the correct patterns and carefully cut the shapes out. I use the term ‘carefully’ somewhat loosely because, unlike sewing projects, there is quite a lot of tweaking that happens during the construction as you pull and secure the fabric in place. The new fabric is a beautiful piece of Lula Fabric’s Suzani in Red which I have had in my stash for years just waiting for the right project. I love this fabric. It is 100% cotton in rich colours and all locally designed and printed. I do worry that it might fade or look worn quite quickly but I think it’s worth the risk.

Finally with all the deconstruction and planning done, we could start with the piece by piece installation. Again my 5 year old was very keen to help with the staple gunning! I put it together slowly: setting, pulling, stapling, trimming, folding and tweaking and stapling some more. I couldn’t find new upholstery tacks so had to reuse some that weren’t destroyed in the deconstruction. I would prefer more down the back of the chair but for now it does the job. One particularly South African challenge was that I needed to plan my work around loadshedding (planned power cuts) so that I could have the light I needed or take advantage of manual work (pulling out staples) when I couldn’t do computer (real) work!

This project has been a long time in the making and I’m so excited with the output! Edith is once again smiling and so am I. Now I just have to keep dirty kids and scratchy cats off the masterpiece!